FIXING EXTRA LINES IN CVS
If extra lines for the same item number appear in CVS (as shown in the example below), follow the steps outlined below to correct the issue.

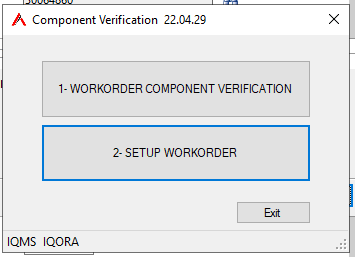
1. Log into CVS and go to Setup Work Order.
2.
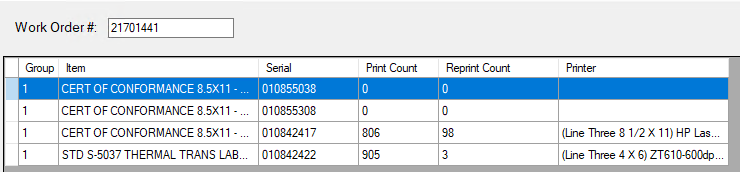
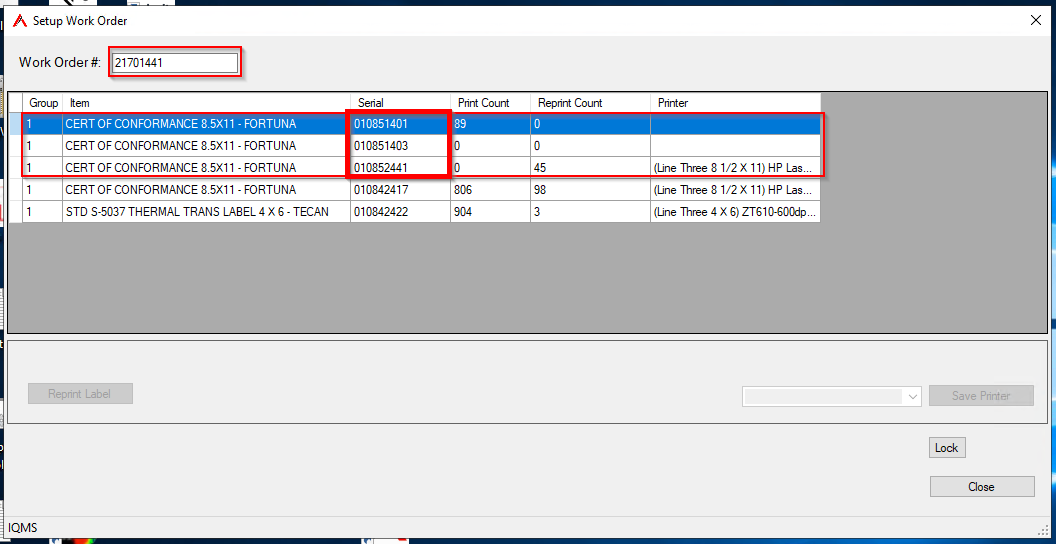
Enter the Work Order number into the box and press Enter.
If the Work Order has already been set up in CVS, it will load several lines.

3. Make sure that the printer column is filled in for all lines.
Set the printer for each line with a blank printer field to match the same printer used on the correct line.
4.
To fix the blank printer lines:
- Select each line where the printer is not filled in.
- Choose the correct printer name.
- Click Save Printer
Verify that every line now has a printer assigned.
If any printer field remains blank, CVS will display an error when attempting to print or process labels.

FIXING INCORRECT LABEL PRINTING FROM CVS
(EXAMPLES BELOW)
If you set up CVS and labels are printing from the incorrect location, for example, if the box label prints from the paper printer, or the Certificate of Conformance (COC) prints from the label printer instead of the paper printer, follow the steps below to correct the issue.
1. Log into CVS and go to Setup Work Order.
2. Enter the Work Order number into the box and press Enter. If the Work Order has already been set up in CVS, several lines will load.
3. Locate the lines for each packaging component.
The issue is likely that the packaging component was printed to the incorrect label. To fix this, continue with the steps below.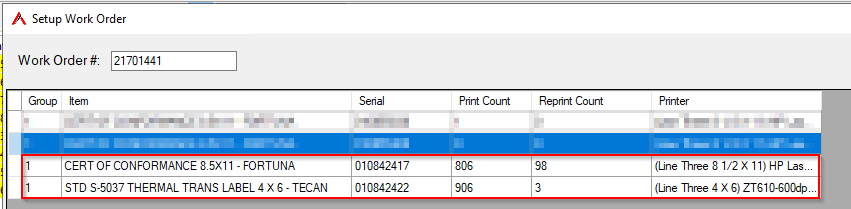
4. Take note of the serial numbers listed and the packaging components they correspond to.
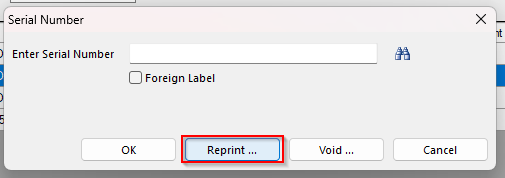
Then, open the Manufacturing tab and click Serial # Tracking.

5. Click Reprint.
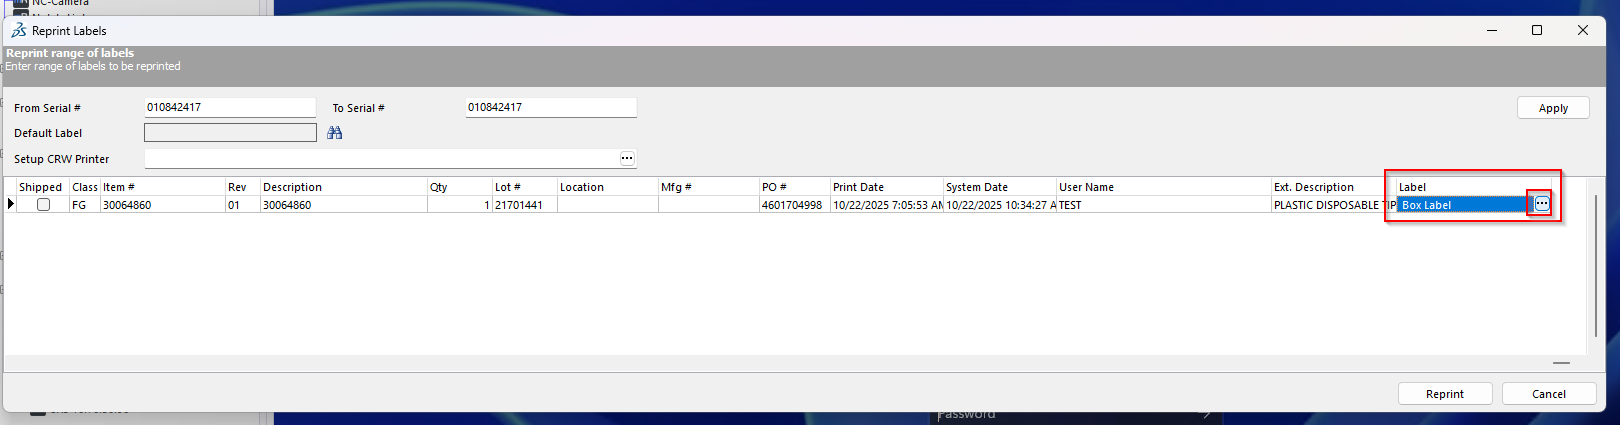
6. In the From Serial Number and To Serial Number fields, enter the serial number for the first item.
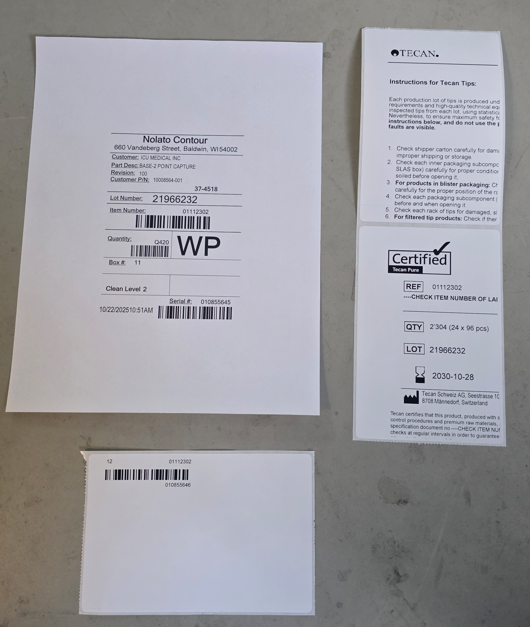
In this example, we’ll be reprinting the CERT OF CONFORMANCE 8.5x11-FORTUNA label.
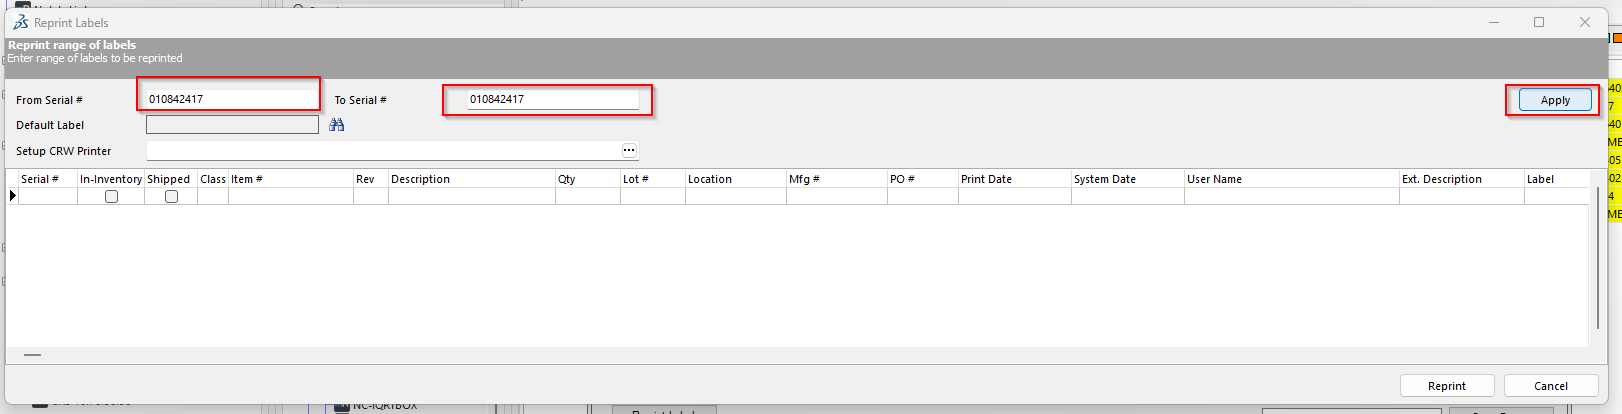
7. Scroll to the far right and locate the Label column.
Verify that the label name matches what is listed in the work instructions.
In this example, the packaging component is CERT OF CONFORMANCE 8.5x11-FORTUNA, so the label should be Fortuna COC_INS.
If the label name is incorrect, click inside the Label box, then click the three dots (…) button.
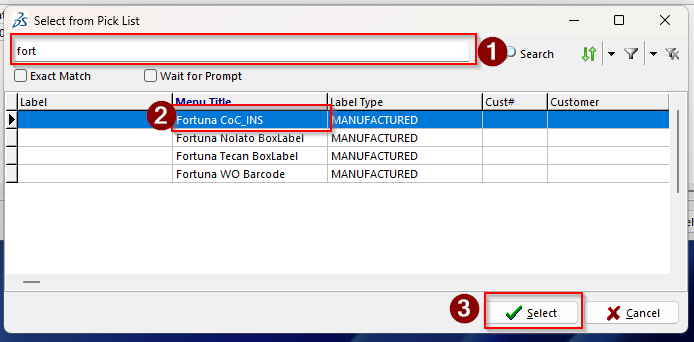
8. The screen shown below will appear after clicking the three dots.
Reference the work instructions for the correct label name associated with the packaging component.
Search for the correct label, select it, and then click Select.
9. Repeat this process for the other serial numbers as needed.
Verify that each label file matches the correct packaging component specified in the work instructions.
Once completed, the issue should be resolved, the COC will now print correctly as a COC instead of as a box label.
RESETTING AND RE-SETTING UP CVS
(ONLY IF ABOVE TROUBLESHOOTING STEPS FAIL)
⚠️ Important:
Do not perform these steps for any jobs that require reconciliation (for example, Boston Scientific jobs).
If you are working with a job that requires reconciliation or are unsure, contact IT before proceeding.
1. If you are setting up CVS and accidentally print more labels than needed for the packaging component, or if something in the setup did not go correctly and you need to remove all the labels and redo the setup, follow the steps below.
2. Log into CVS and select Setup Work Order.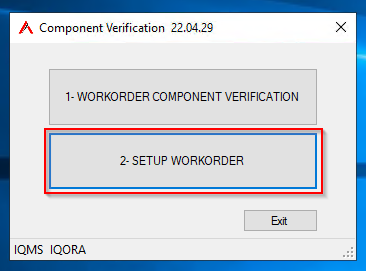
3. Enter the Work Order number.
In the example below, too many CERT OF CONFORMANCE 8.5x11-FORTUNA labels have been printed, and some of the lines do not have printers selected. Both of these issues can cause problems with CVS.
To fix this, we need to void the labels outlined in red.
Take note of the serial numbers inside the red box, we will need these to void the labels.
If you void the incorrect label, you will need to repeat the CVS setup steps in the work instructions.
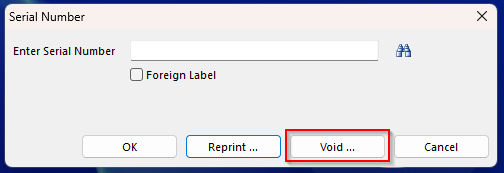
4. To fix this, open the Manufacturing tab, then click Serial # Tracking.
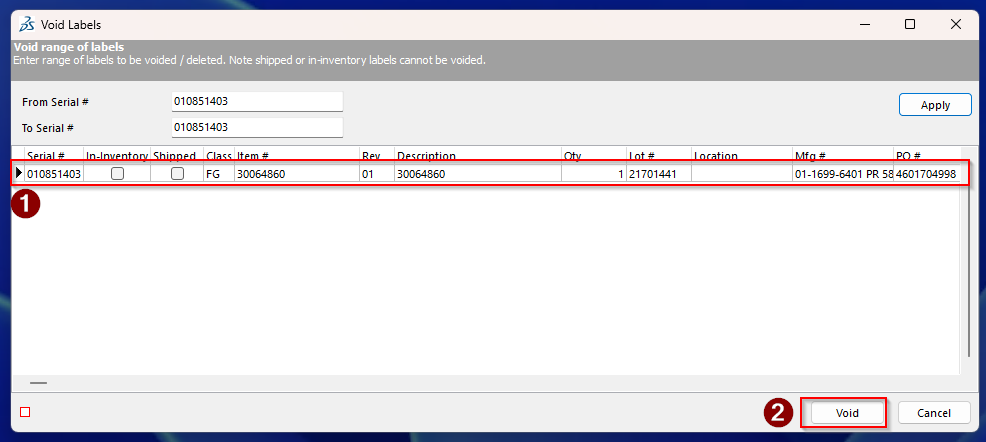
5. On the screen below, click Void.
6. You will need to void each serial number individually.
Enter the serial number into both the From Serial Number and To Serial Number fields, then click Apply.
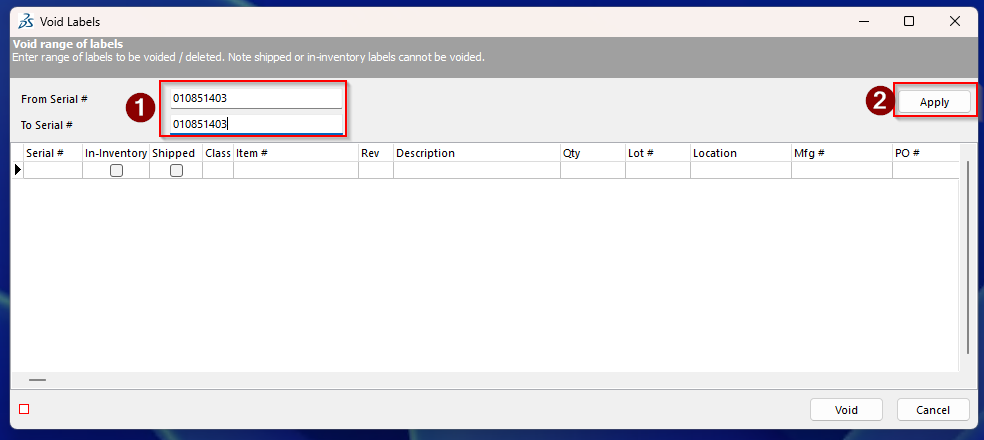
7. Only one line should populate.
Make sure the serial number on this line matches the one you want to void.
Then click Void.
8. Return to CVS and verify that the labels have been removed.
Once verified, reference your work instructions on how to re-set up CVS if needed.