Below are instructions to create a site. Once the site is created, you can just add folders and set permissions per folder to share with different people/vendors. To do this, start at step 7.
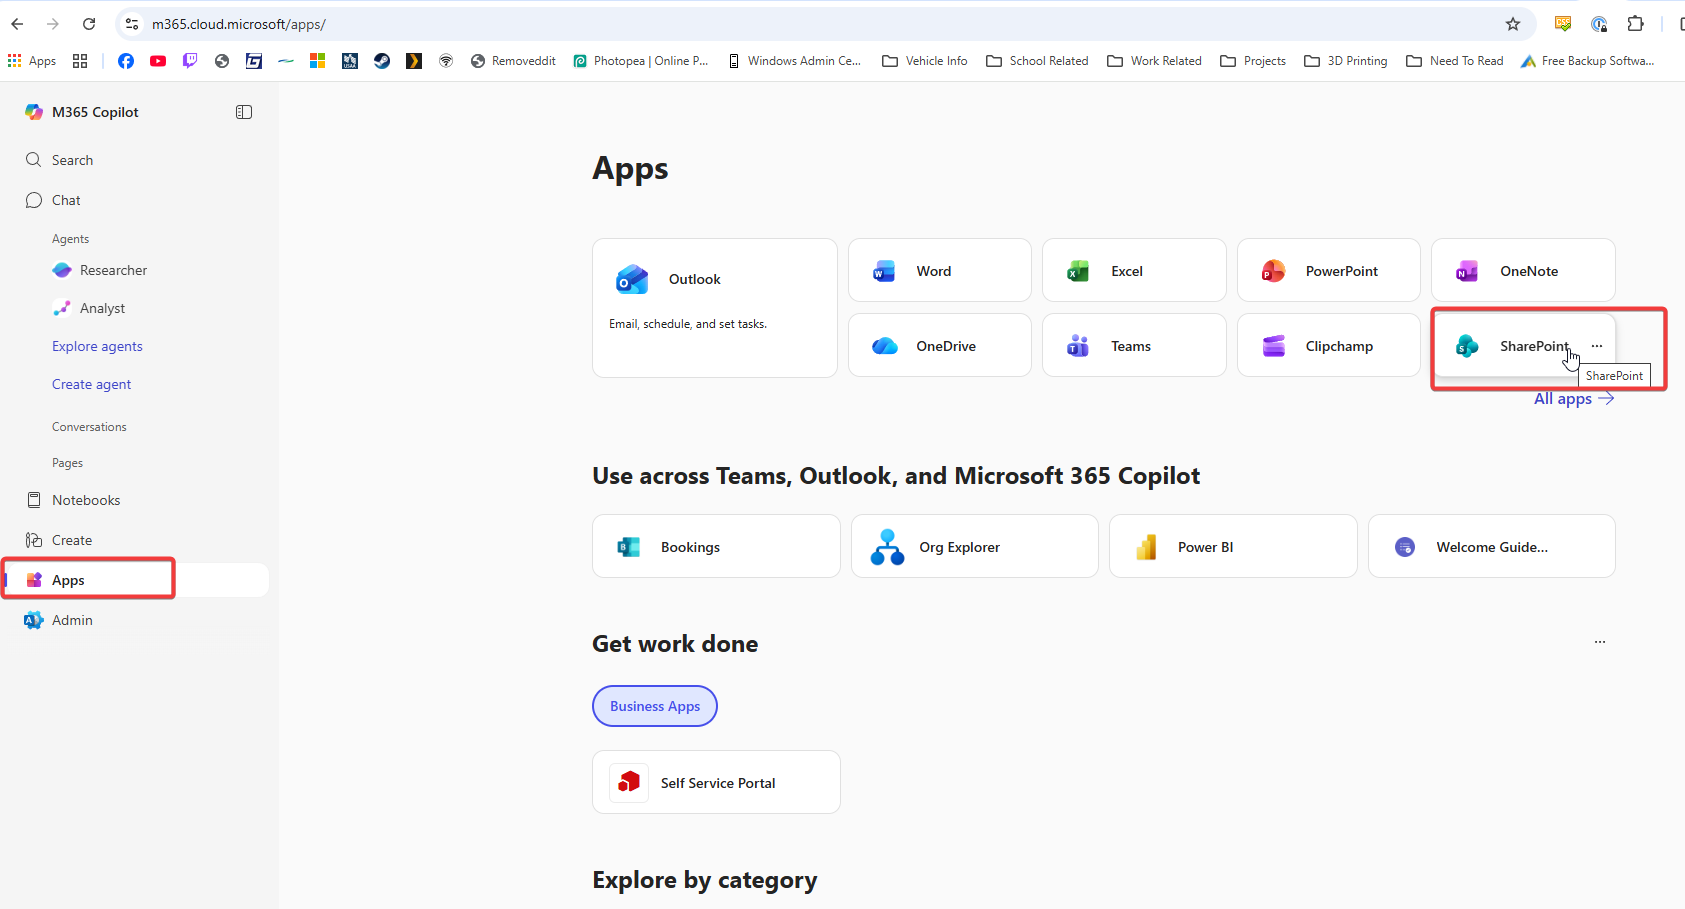
- Login to sharepoint
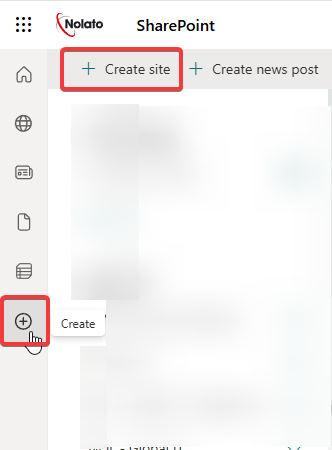
- Click Apps, then Sharepoint. If it is not listed there, click on All Apps and find it there.
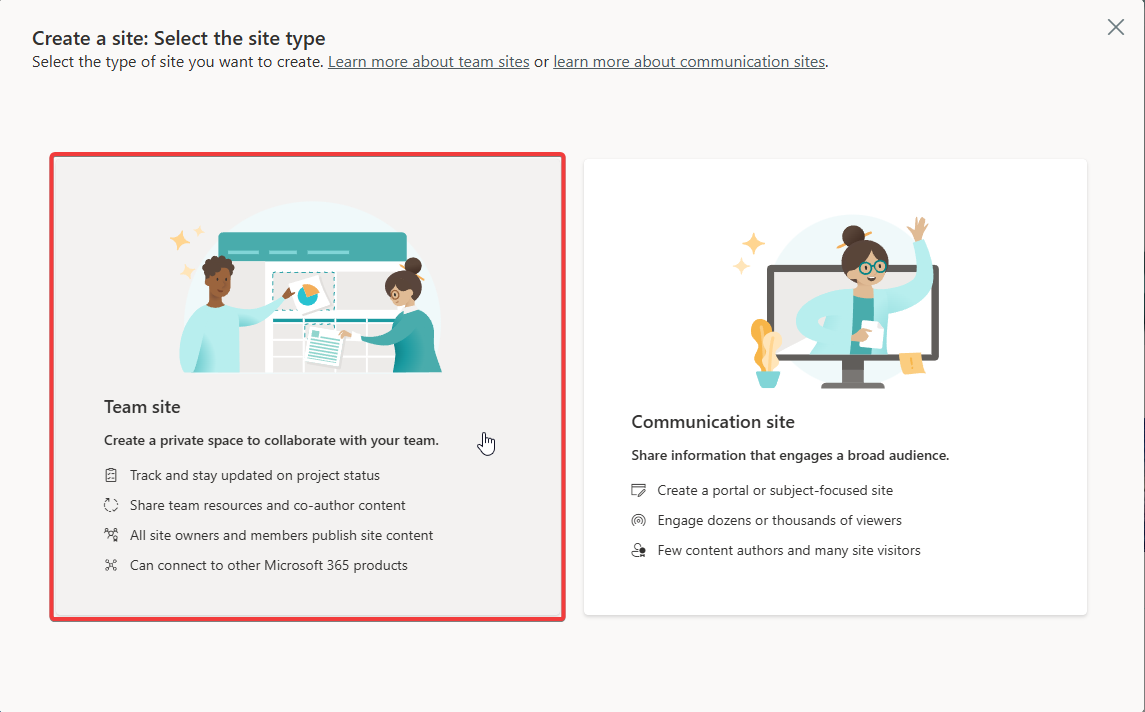
- Click Create Site, or Create > New Site
- Select Team Site
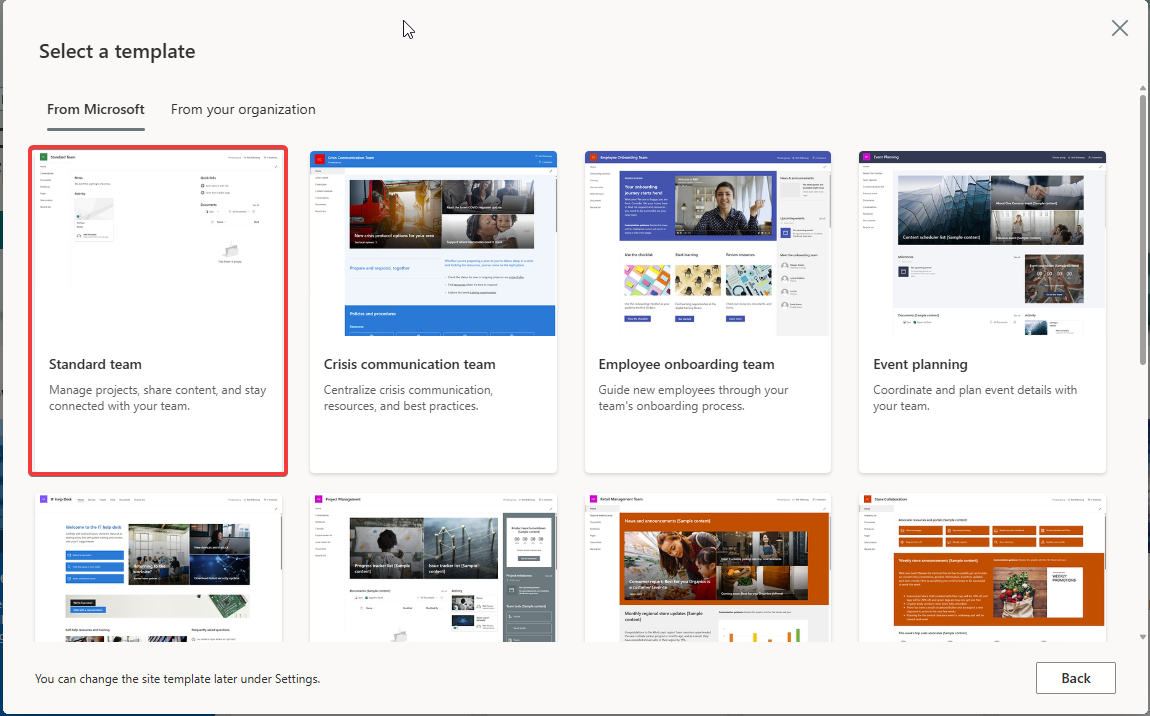
- Select a template, for this I will be using Standard team
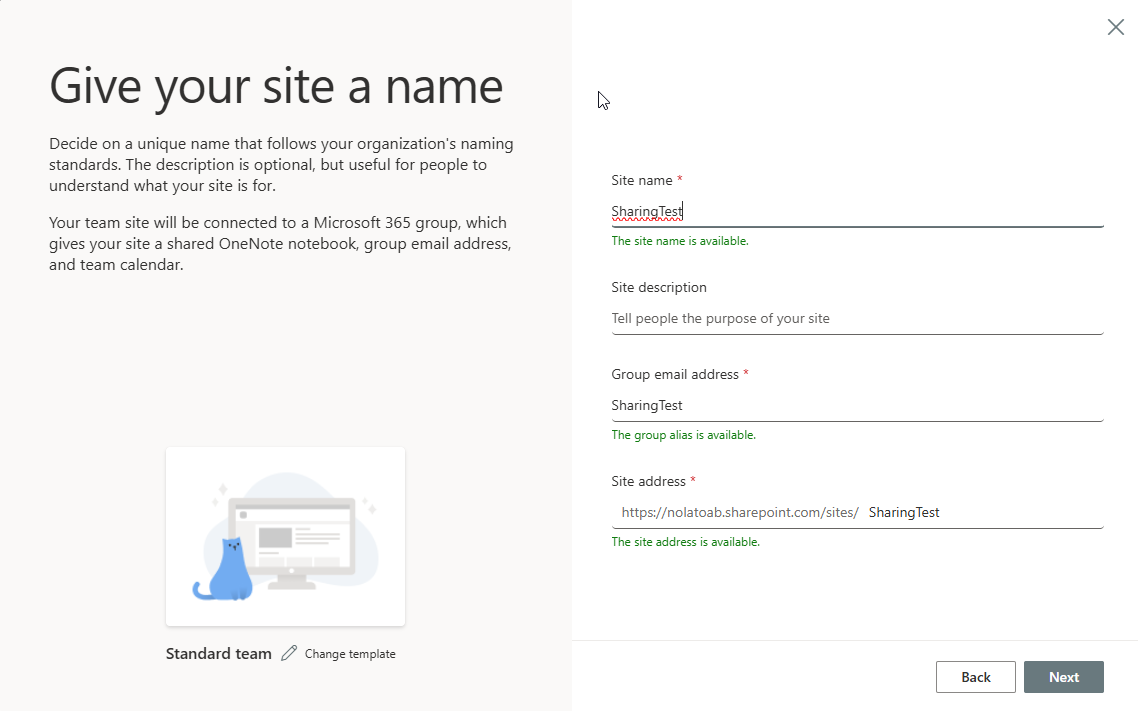
- Name your site, mine will be named SharingTest
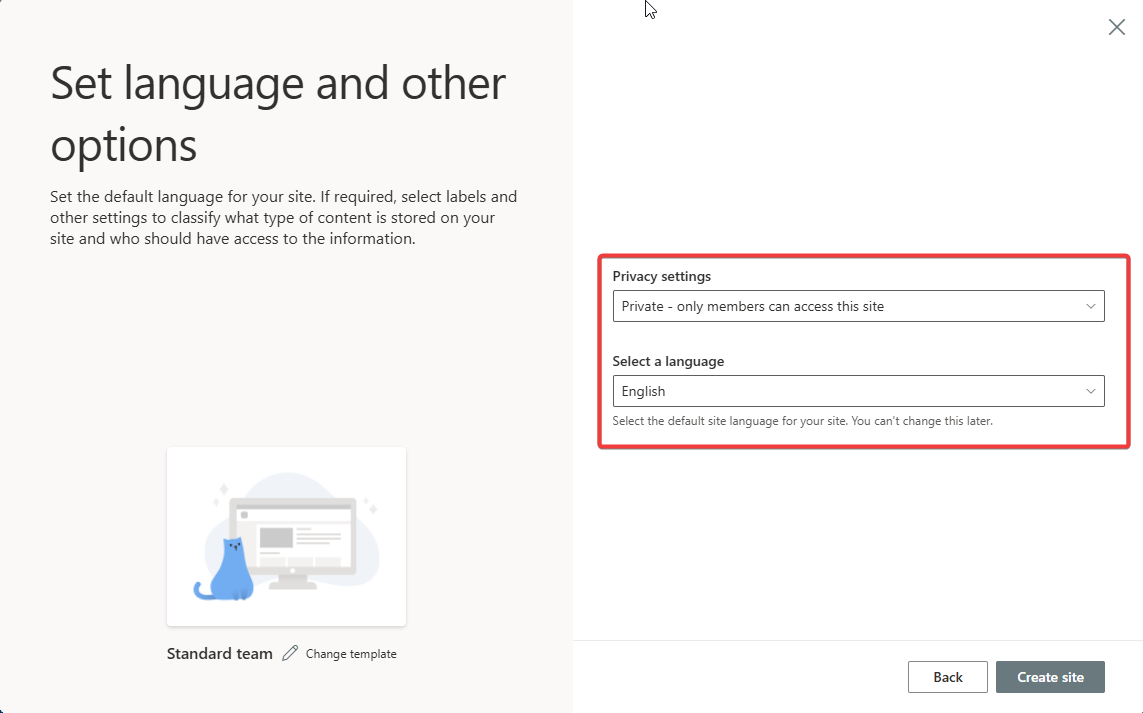
- Leave it set to Private and then create Site
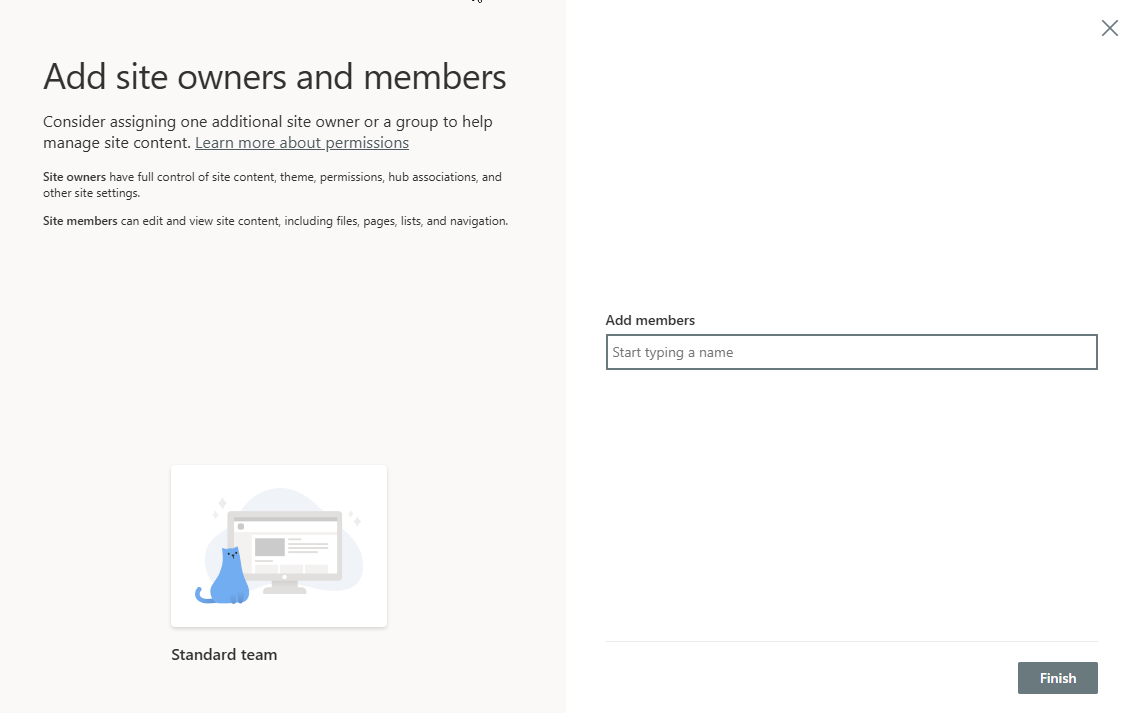
- You can add internal members here if you would like, otherwise you can add others later.
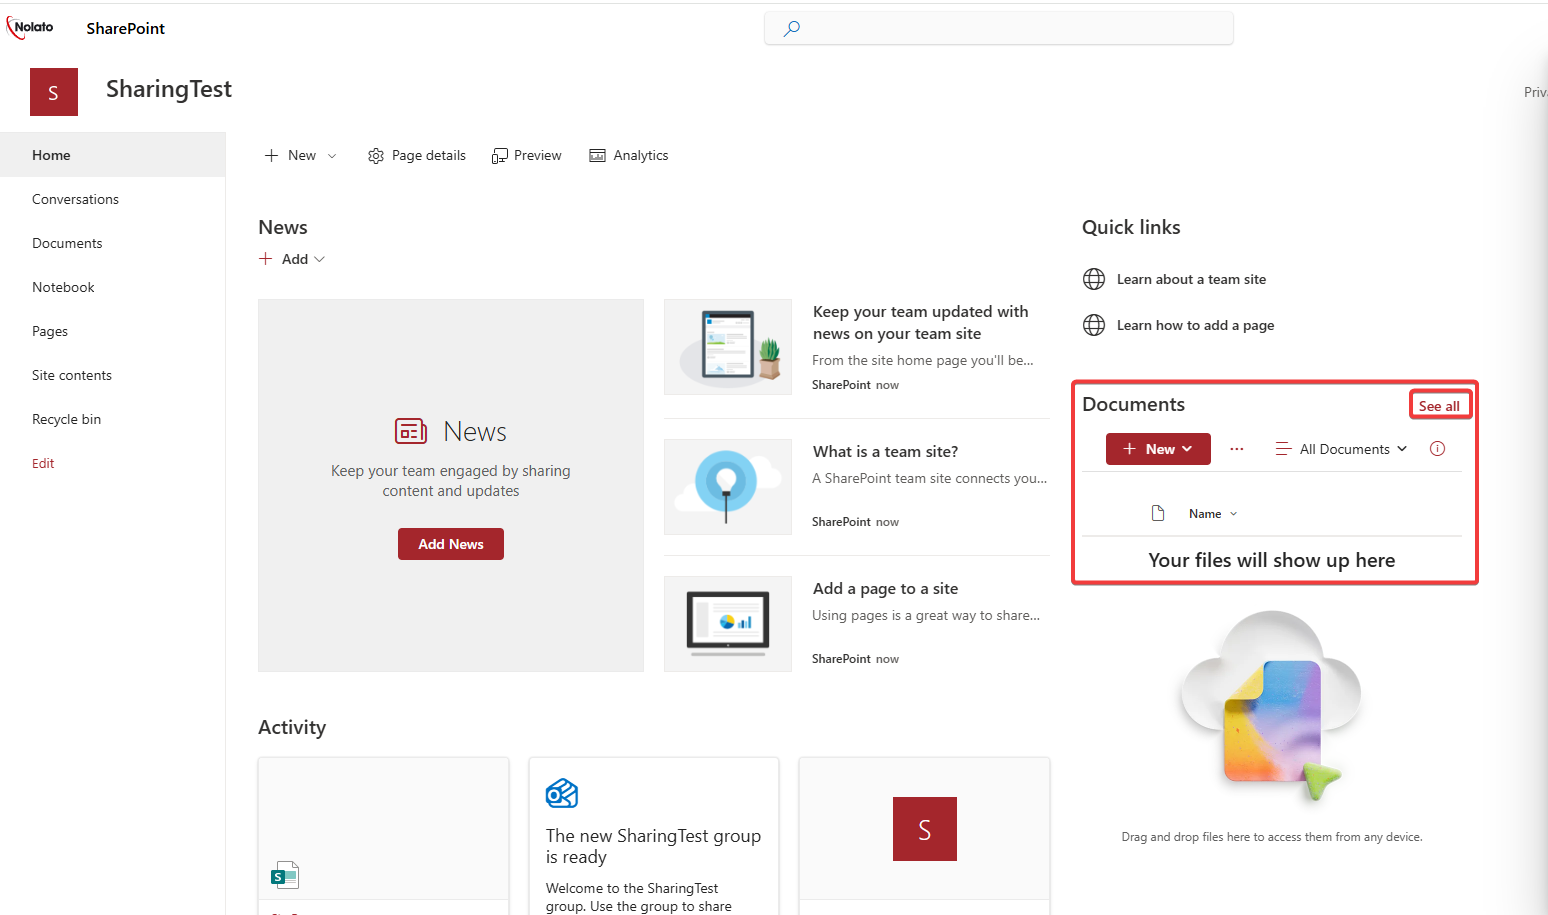
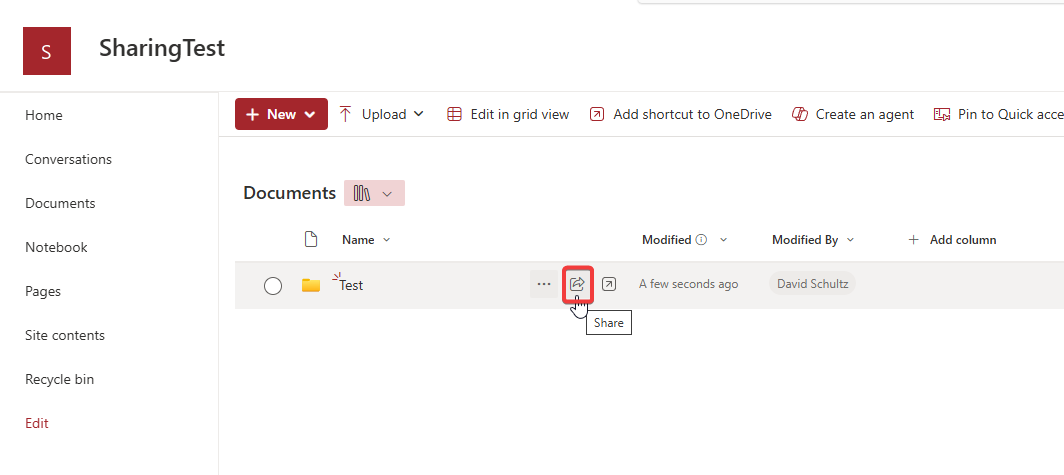
- Click See All in the Documents area
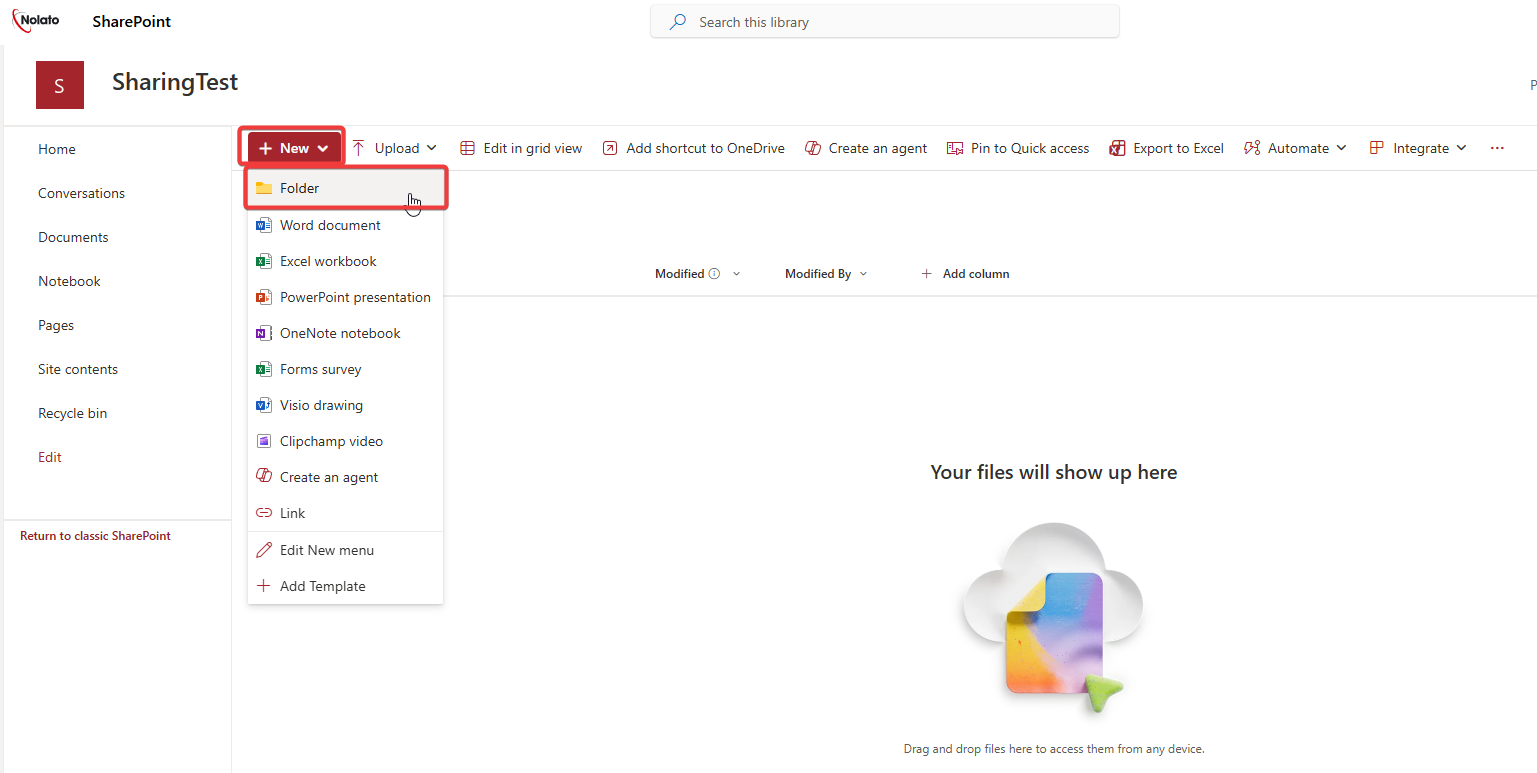
- Create a new folder
- You can then upload files into the folder using the upload button.
- Click the Share button
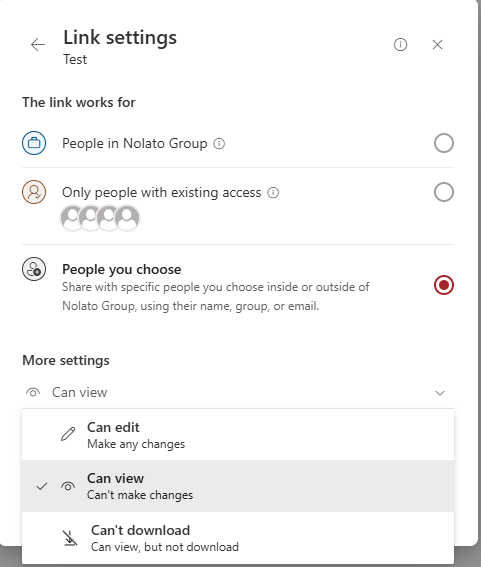
- Add an Email in here and select the permissions that they can have for the folder.
- If you would rather use a link, select the Gear Icon next to the link and then you can select the settings for it. You can change if they have edit permissions and link expiration dates here.